Form flows are an effective solution for combining multiple forms into a cohesive flow. Instead of overwhelming customers with many separate links, Form Flows now provides a single link. This link guides the customer through all necessary steps while providing a clear overview of the status and progress of the forms
How to build a form flow in Sweet Forms:
Form flows are a powerful feature that allows you to link together and navigate between multiple forms seamlessly. Follow these steps to create and manage your form flow:
Tip! View it in full-screen mode
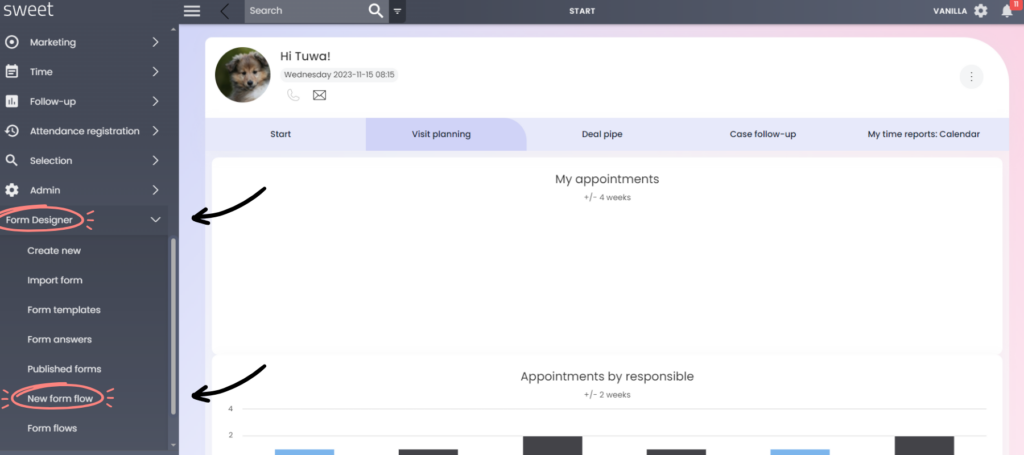
Step 1: Accessing the Form Designer
- Log in to your account: Start by logging in to your account on Sweet.
- Navigate to the Form Designer menu option: Once logged in, go to the sidebar and select ‘Form Designer’ from the menu
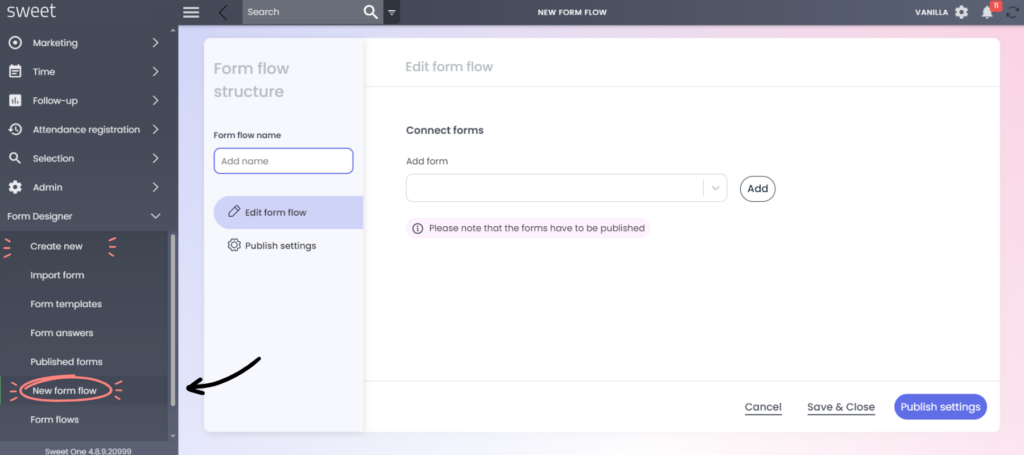
Step 2: Create a new Form Flow
- Under the ‘Form Designer’ menu option, click on the choice for ‘New Form Flow’: This will initiate the creation process.
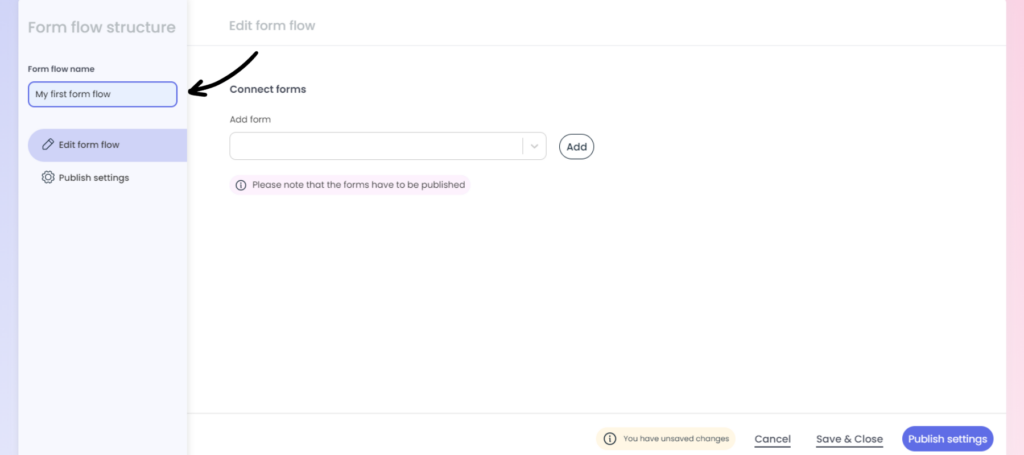
Step 3: Name your Form Flow
- Name your form flow: Once inside the form flow editor, start by naming your flow. Choose a descriptive name that reflects the purpose of this flow.
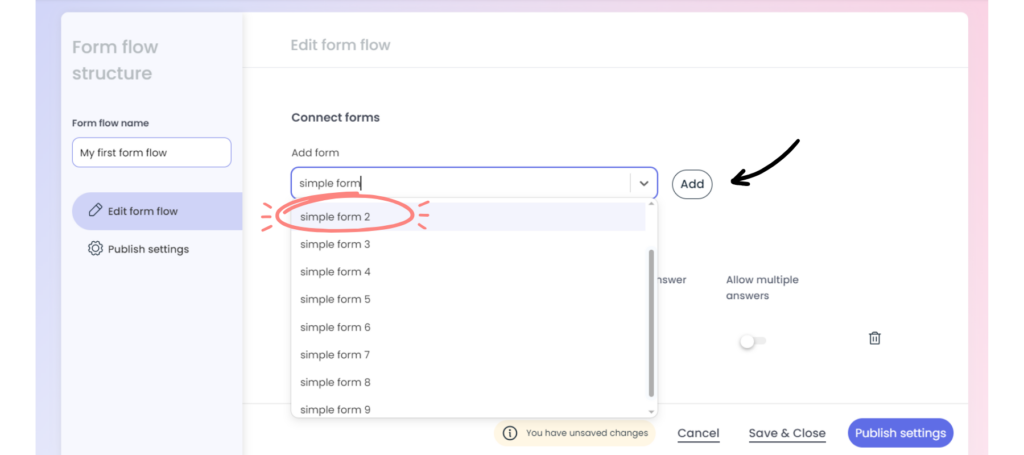
Step 4: Add forms to the Form Flow
- Choose existing forms: Under ‘Connect Forms,’ you can now select which published forms should be included in your form flow. Once you have selected your forms from the dropdown list, click ‘add,’ and the forms should now appear in a list.
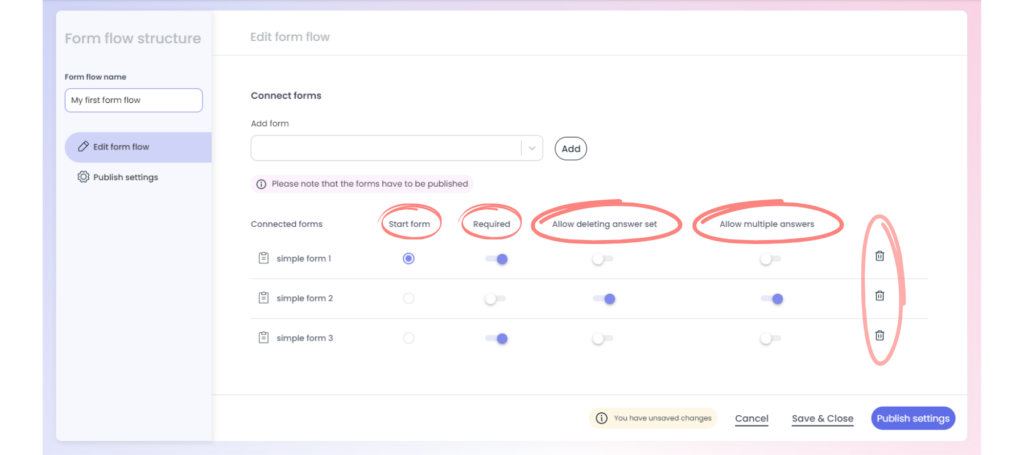
Step 5: Configure settings for the Form Flow
- Select the starting form: Choose which form should be the starting point for your form flow. This is the form that users begin with when they click on the link.
- Set mandatory forms (if appropriate): If there are forms that must be answered, make sure the ‘Mandatory’ option is activated for these forms.
- Set up response settings: Decide whether the forms should allow deletion of responses and/or allow multiple responses.
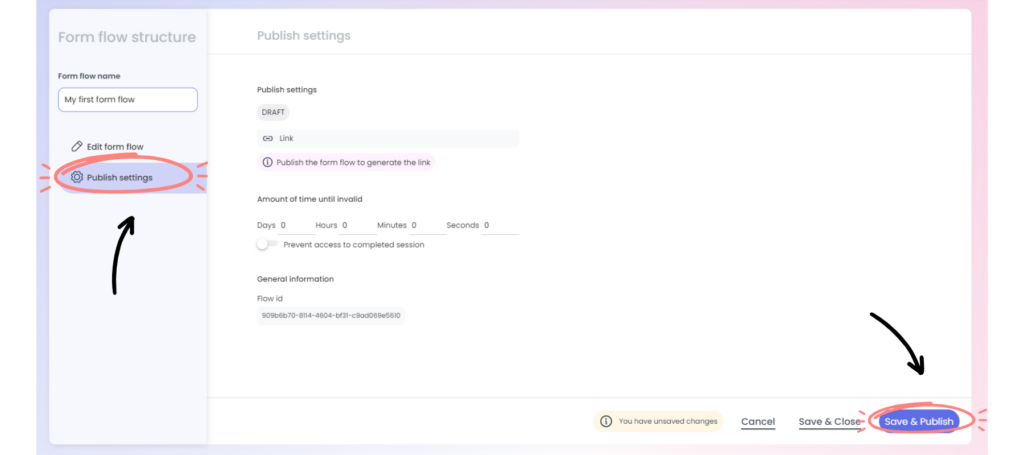
Step 6: Publish and save your Form Flow
- Save and publish: Once you have reviewed and configured all settings, navigate to ‘Publish Settings’ and click ‘Save and Publish’.
- The link to the form flow becomes available after the form has been published. Once the form flow is published, the settings are read-only.
- If you want to make changes to the form flow, you must first unpublish the form flow.
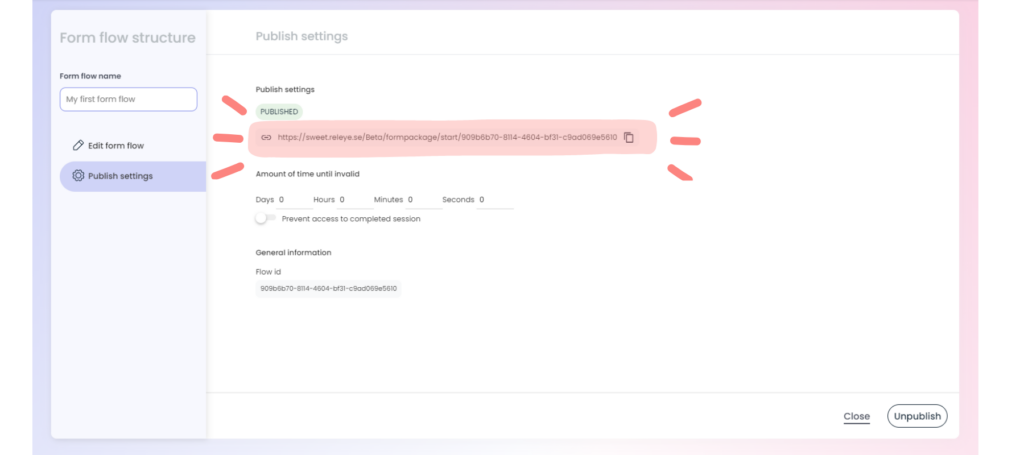
Step 7: Test your Form Flow!
- Generated link: Once the form flow is published, a link will be generated for the form flow.
- Copy the link and paste it into the browser.
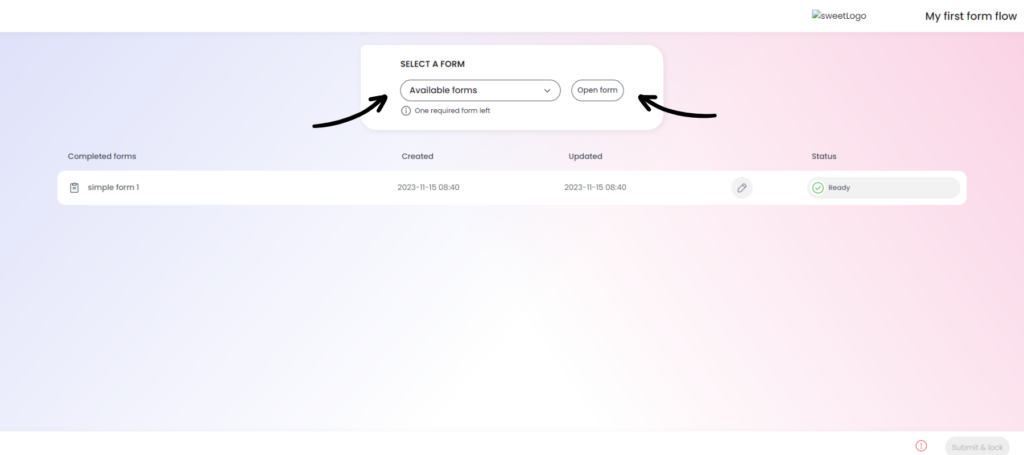
Step 8: Form Flow overview
- Starting form: After opening the form flow from the link, you are automatically redirected to the form set as the starting form.
- Redirection: After responding to the first form, the user is redirected to the overview.
- Edit: The list of completed forms is sorted by the time of completion. All answered forms are editable.
Depending on the settings in the form flow editor, the user may see different options in the overview. Read more here!
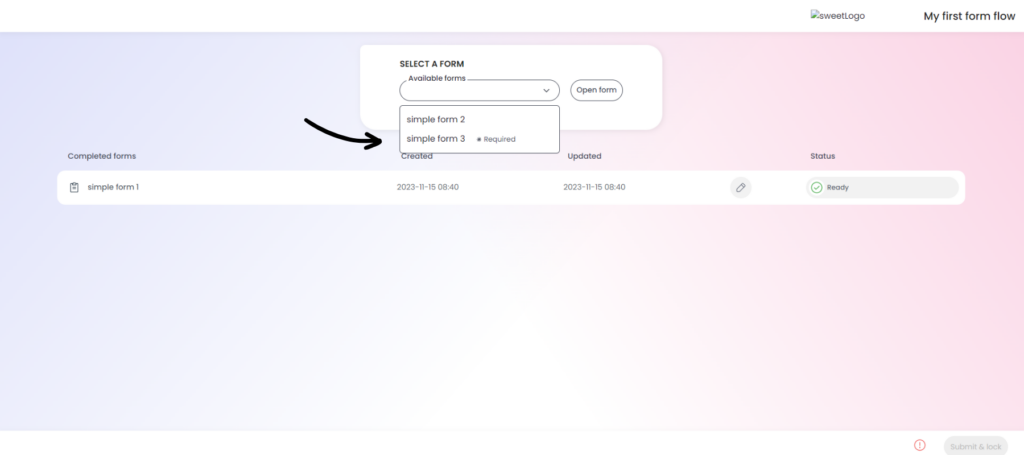
Step 9: Respond to more forms in the Flow
- Overview: Under the dropdown list ‘Available Forms’, you can see how many forms are left to respond to, and whether they are mandatory.
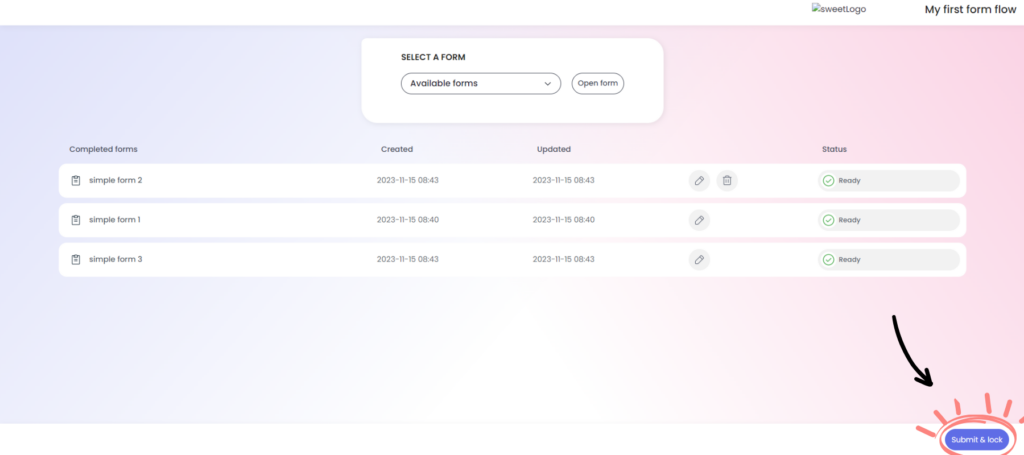
Step 10: Submit forms
- Finish and Lock: When you are satisfied with your responses to the forms in the form flow, click on ‘Finish and Lock’”.
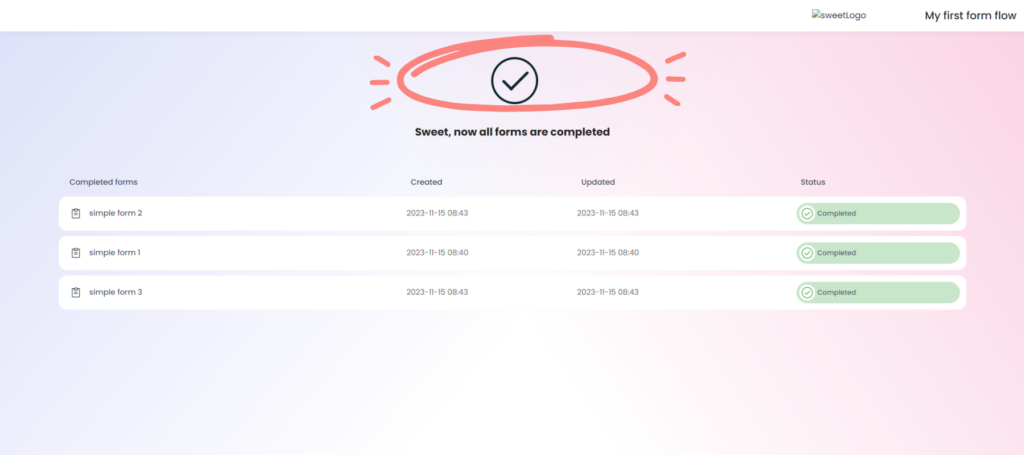
Step 11: Done!
- After clicking ‘Finish and Lock’, the form flow will process and lock the response sets. If any of the forms require an e-signature, the e-signature will be activated at this step based on the e-signature settings in the individual forms.
- Once save and lock have been successfully performed, this view will be visible.
Congratulations!
You have now successfully created a Form Flow with our platform. This feature enables a smooth transition between forms, streamlining data collection and automating workflows.
If you have any further questions or need additional assistance, do not hesitate to consult our help center or contact our support team.

